As an Amazon Associate, we earn from qualifying purchases. Some links on this site are affiliate links at no extra cost to you. Our recommendations are based on thorough research and editorial judgment.

DIY Mounting Principles: Load, Leverage, and Common Failure Points
For successful DIY mounting, prioritize load distribution by confirming the weight of items and using appropriate hardware. Guarantee heavy loads are mounted close to walls for better stability. Leverage techniques, such as proper fulcrum positioning, to ease lifting and reduce strain on your body. Regularly check hardware for wear or rust, as these can lead to failures. Understand common mistakes, like poor weight distribution, to avoid accidents. Further details on installation and maintenance practices await for enhanced guidance.
Key Takeaways
- Ensure proper load distribution across mounting points to prevent failure and maintain stability when installing heavy items.
- Utilize leverage techniques, such as positioning the fulcrum closer to the load, to facilitate easier lifting and reduce strain.
- Regularly inspect and maintain mounting hardware to identify wear or rust, which can compromise safety and lead to failures.
- Avoid common mistakes, such as not verifying item weights or using inadequate hardware, to ensure successful and safe installations.
- Protect mounting hardware from environmental factors like humidity and temperature changes to prolong their lifespan and integrity.
Understanding Load Distribution for Secure Mounting

You may be interested


When you’re mounting something securely, it’s super important to think about how to spread the load across different points. Think of it like balancing a heavy backpack; putting all the weight on one strap can hurt your shoulder, right? By distributing the load evenly, you reduce the chances of any single point failing, which is especially crucial when dealing with heavy objects.
Now, one of the key things to consider is the center of gravity (CG). This is basically the point where the weight is evenly distributed. If you position your load right around the CG, it’ll be much steadier. For example, if you’re hanging a shelf, make sure it’s balanced over the support brackets rather than hanging off to one side. Also, don’t forget about the material you’re mounting onto. Different surfaces have different weight limits, so it’s key to know how much your mounting surface can handle.
After setting everything up, take a moment to check how things are looking. Regularly assessing the load distribution can help spot any potential issues before they become serious, keeping everything safe and secure. Using mounts with heavy-duty adhesives ensures a secure attachment that can handle the load effectively.
How to Leverage Proper Techniques in DIY Mounting

So, you’re diving into a DIY mounting project, and you want to make sure it’s both secure and efficient? Great choice! The first step is to really think about how heavy the items you’ll be mounting are. This helps you choose the right mounting hardware that can support that weight. For example, if you’re hanging a shelf with books on it, you’ll want to check the Working Load Limits (WLL) of the brackets you plan to use. This ensures they won’t buckle under pressure.
Next, let’s talk about leverage. Imagine a seesaw; the closer you place the weight to the middle, the easier it is to balance. The same idea applies here! Placing your heavy load closer to the wall or fulcrum will give you more stability. Also, make sure the surface you’re mounting on is level and solid. Think of it like setting up a tent; a shaky ground can turn it into a disaster.
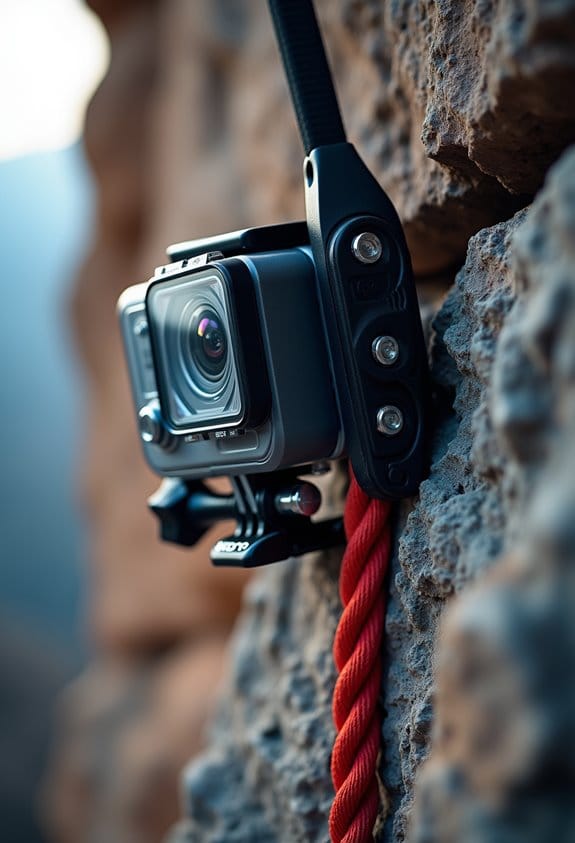
Safety is super important too! Wear gloves to protect your hands, and clear the area of any clutter to prevent trips or accidents. For instance, using a step stool can help you reach higher spots without risking a fall. Additionally, considering mounts made from sturdy aluminum construction can enhance durability and support heavier equipment reliably. By following these handy tips, you’re on your way to creating a safe and effective mounting solution that stands the test of time. Ready to tackle more details with your project? Let’s move on!
Identifying Common Mistakes in DIY Mounting
Hey there! Let’s chat about some common mistakes people make with DIY mounting. It’s super important to get it right, especially if you want to keep everything safe and functioning well. First off, always check the weight of what you’re hanging—this helps you pick the right hardware. For instance, if you’re mounting a heavy mirror, knowing its weight will guide you to use sturdy anchors that won’t give out.
Next up, make sure you’re using slings and mounting devices that can handle the load. You wouldn’t want to trust an old rope to hold up a garage shelf, right? A quick inspection for any wear and tear in your gear can save you from a big mess later on. Also, take a close look at the surface where you’re mounting—if it’s weak or damaged, it could lead to a collapse, and that’s the last thing you want!
And don’t forget about weight distribution. If you’re hanging something heavy, you’ll need to balance it out to avoid accidents. Think about how a bookshelf leans if the books are piled unevenly; same concept applies here. Paying attention to these details can make your DIY projects a whole lot safer and more successful. So, now that we’ve covered these basics, let’s go over some insider tips for picking the best mounting hardware! For instance, considering durability and ergonomic design can greatly improve the reliability and convenience of your mounting solutions.
Safe Lifting Techniques for DIY Projects

Hey there! So, when it comes to lifting heavy objects safely, it’s all about technique and knowing your limits. First things first, make sure the weight of what you’re lifting is manageable—generally, if it’s over 50 pounds, it’s a good idea to get a friend or use some tools to help out. Trust me, your back will thank you!
When you’re ready to lift, remember to bend your knees, not your waist. Use your legs to power up while keeping the load close to your body—this helps you keep your balance, just like when a crane operator maneuvers a hefty load. It’s also smart to stand with your feet shoulder-width apart for stability. And avoid twisting your body; that can lead to injuries faster than you’d think.
If you’re dealing with something really heavy or awkward, think about grabbing a dolly or hand truck. For instance, if you’re moving a bookshelf filled with books, using a hand truck will make it a whole lot easier and safer, both for you and your precious stack of novels. Plus, regularly practicing these safe lifting techniques can help prevent long-term muscle stress, which is super important for anyone who loves DIY projects. Also, always be mindful of any common failure points to avoid accidents while handling loads.
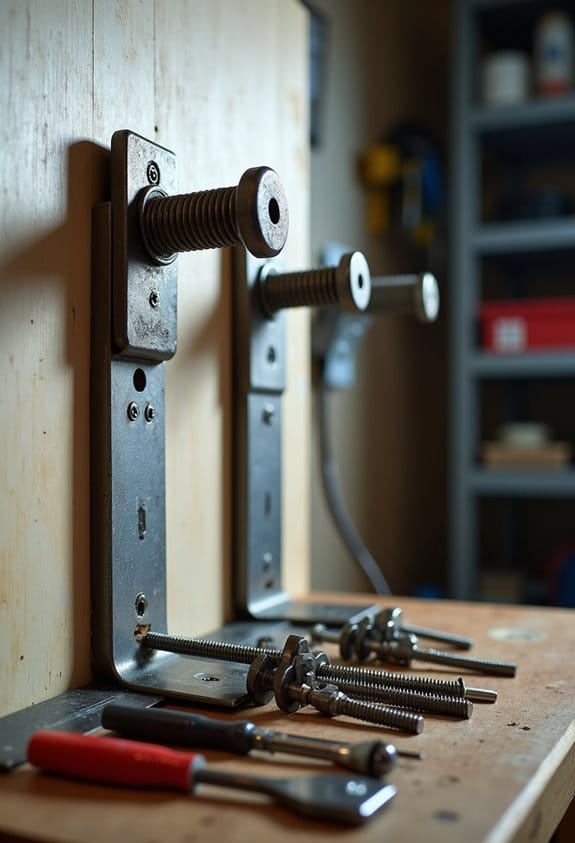
Picking the Best Tools for Your Mounting Project

When it comes to a mounting project, choosing the right tools is super important for a successful installation. Think of it this way: if you’re hanging something heavy, like a large mirror or a TV, you want to make sure you’re using the right drill bits, anchors, and screws that match your wall type—whether it’s drywall, concrete, or wood. For those heftier items, definitely go for load-rated anchors; they come with specific weight limits to keep everything safe and sound.
And here’s a handy tip: use a stud finder! It’s a simple tool that helps you locate those sturdy wooden beams behind your drywall, making sure you’re not accidentally drilling into plumbing or electrical wires. Plus, using ergonomic tools like electric screwdrivers can save you from fatigue, speeding up the process nicely.
Don’t forget to whip out a level tool! This nifty gadget ensures your mounted pieces are straight, preventing that pesky tilting over time. Imagine putting up a beautiful picture frame only to watch it slowly lean to one side—nobody wants that! So, grabbing the right tools not only makes the project easier but also keeps your home looking sharp and safe. Ready to jump into the actual installation process? For projects involving electronics and cameras, consider also the importance of protective gear and durable storage cases to keep your equipment safe before and after mounting.
Ensuring Mounting Stability & Troubleshooting Issues
Hey there! When it comes to ensuring mounting stability, it’s super important for keeping everything safe and secure, especially when you’re dealing with heavier items. First off, you want to check that all your mounting surfaces are nice and even—think of it like making sure your table isn’t wobbly before piling on the snacks for a game night. You can consult load capacity charts or the manufacturer’s specs to make sure you’re using the right gear for the job.
Now, let’s talk about installation. Using good leverage techniques can make a big difference. For example, if you’re lifting something hefty, try moving the fulcrum closer to the load; it helps you lift more easily and puts less strain on your back. Once everything is up and secure, don’t forget to keep an eye on the mounting hardware. A quick check for wear and tear every now and then can save you from a potential disaster down the line.
Also, keep environmental factors in mind! Things like humidity or drastic temperature changes can weaken your hardware over time. So, if you notice rust or a bit of loosening, address it right away. This way, you’ll ensure your mounting system remains stable and performs well for a long time. Speaking of stability, let’s look at other elements that contribute to a safe setup.
Frequently Asked Questions
What Are the Three Factors That Determine the Safe Working Load of the Crane?
The safe working load of a crane is determined by crane stability, weight distribution, and rigging factors. Additionally, material limitations play a critical role in ensuring the crane operates safely under various load conditions.
Where Should the Load Be Placed While Lifting?
The load should be positioned close to the center of gravity to enhance load stability, consider safety margin factors, and maintain equipment balance. Effective load placement techniques minimize tipping risks during lifts and guarantee overall operational safety.
What Is Improper Rigging Technique?
Improper rigging technique encompasses inadequate inspection of equipment, improper sling usage, load angle mistakes, and overloading concerns, all of which compromise safety. Regular maintenance of rigging gear is essential to prevent accidents and guarantee effective operations.
When Lifting a Load, Where Should the Hook Be Positioned Over the Load to Give Maximum Lifting Efficiency?
To guarantee maximum lifting efficiency, the hook should be positioned directly over the load center. This alignment optimizes lifting angles, balances distribution, and enhances efficiency optimization, thereby minimizing the risk of instability during the lift.