As an Amazon Associate, we earn from qualifying purchases. Some links on this site are affiliate links at no extra cost to you. Our recommendations are based on thorough research and editorial judgment.

Reframing Wide-Angle Footage: How to Crop Without Losing Quality
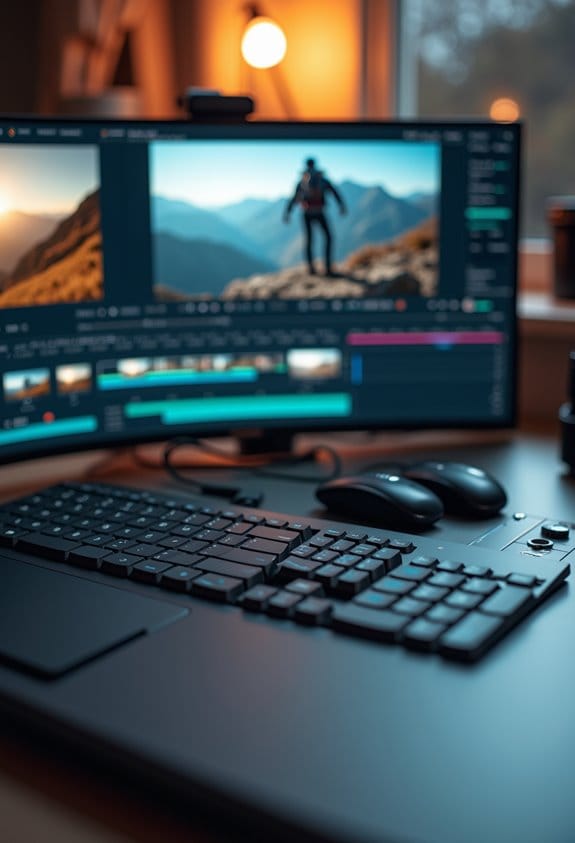
Reframing wide-angle footage requires careful methods to avoid quality loss. Start with high-resolution video to guarantee clarity when cropping. Utilize reputable editing software to maintain the original aspect ratio and adjust edges without distortion. After cropping, enhance brightness and contrast to improve visuals. Always check audio sync and preview edits before export. Match export settings to the new dimensions while maintaining the original frame rate for smooth playback. Continue to explore detailed techniques for ideal results.
Key Takeaways
- Start with high-resolution footage to ensure clarity during cropping without quality loss.
- Use reputable editing software to maintain the original aspect ratio and prevent distortion.
- Carefully adjust edges and visual settings, like brightness and contrast, after cropping for enhanced presentation.
- Regularly preview your edits to identify necessary adjustments before final export to maintain video quality.
- Match export settings with the new dimensions to preserve sharpness and maintain the original frame rate for smooth playback.
What Is Reframing in Video Editing?
You may be interested


Reframing in video editing is such a cool technique! It lets you change the way a shot looks after you’ve already recorded it. Think of it like adjusting the angle of your camera while watching a live concert—you can focus on the lead singer or pan to capture the crowd enjoying the music. This is especially important for 360º videos, where you have a ton of angles to play with.
To reframe effectively, you can zoom in on important moments, switch perspectives, and tweak the field of view (FOV). For example, if you’re editing a travel video and want to highlight a stunning sunset, you could zoom in to make that moment pop, or shift the angle to include more of the beautiful landscape. Using tools like mobile apps or desktop software, plus features like keyframes, gives you precise control over how the scene unfolds, keeping the audience engaged. Many popular action camera gimbals come with 3-axis stabilization technology that helps capture smooth footage, making your reframing even more seamless and professional-looking.
Why Ensure Quality When Cropping?

Hey there! When you’re cropping video footage, it’s super important to maintain quality so your project looks its best. Think about it: if you crop a part of your video and then blow it up to fill the screen, you might end up with a blurry image — definitely not what you want! That’s why keeping an eye on the aspect ratio is key. For example, if you’re working with a widescreen video and crop it to a square without adjusting the size properly, everything can end up looking squished or stretched.
Also, remember that cropping can reduce your video size, which might impact your frames per second (FPS). If your FPS drops too low, you could experience lag during playback, making your video feel choppy. Imagine watching a fantastic action scene in slow-motion instead of seamless flow — it really takes away from the experience! Additionally, if you crop too much, you might lose important visual context. Picture a tutorial where the main action is cropped out; viewers won’t get the full picture and might miss the point completely.
Before you hit that export button, always double-check your settings. It’s a bummer to find out that the audio doesn’t sync with the video in the final product. So, keeping these aspects in mind will help you create awesome videos that really resonate with your audience! Also, working with footage captured on a high-speed microSD card can help maintain smooth recording and reduce quality loss during editing.
Techniques for Cropping Wide-Angle Footage

Hey! So, let’s chat about how to crop wide-angle footage without losing that sharp image quality and overall vibe. When you’re working with wide shots, make sure you’re starting with high-resolution footage. This way, if you need to crop part of the image to focus on something specific, you won’t end up with a blurry mess!
Using reputable editing software is key, too. Look for options that allow you to maintain the original aspect ratio; this helps keep the image looking as close to the original as possible. For example, if you’re editing a landscape shot and want to crop out some excess space on the sides, simply adjust the edges without zooming in too much. This way, you keep the details clear and crisp.
After you’ve done your cropping, don’t forget to tweak the brightness and contrast a bit. This little adjustment can really enhance the visual appeal of the footage, but be careful not to overdo it! Finally, always keep in mind where your video will end up, like Instagram or a YouTube channel. This can guide you on the best aspect ratios to use, ensuring your cropped footage looks great no matter where it’s seen.
Also, using footage with 4K resolution quality gives you the flexibility to crop extensively while retaining sharpness, thanks to the higher pixel density.
Got any specific shots in mind you are thinking of cropping?
Tools and Techniques to Enhance Video Quality After Cropping

Once you’ve finished cropping your video, boosting its quality should be at the top of your to-do list. Start by grabbing a good video editing software, like Wondershare Filmora, which comes with some neat AI tools that can adjust brightness and contrast. This way, you’ll ensure your video looks bright and clear! For instance, if you’re working on a travel vlog that’s gone a bit dark, tweaking these settings can really bring out those stunning colors in your footage.
Now, here’s a cool feature to check out: the auto reframe function. This tool helps you adjust your video’s aspect ratio easily, whether you’re switching to a 16:9 for YouTube or a 1:1 for Instagram, all without sacrificing the quality. Just remember, always import your videos in their original resolution. This little step will keep all the fine details intact, which is super important after cropping.
After that, it’s time to tackle any noise in your video. Many editing programs have a video denoiser option that cleans up unwanted sounds or visual distortions. Imagine you’re putting together a family gathering video, and there’s some graininess – using this tool can really polish it up! And don’t forget to regularly preview your edits. This way, you can fine-tune the brightness and contrast until everything looks just right. Once you’ve got it all set, you’ll be ready for the final export! Speaking of exporting, let’s look at some tips to make sure your final file is as nice as the edits you just did.
Also, when working with large video files, consider using a 256GB memory card with high read/write speeds to ensure smooth data transfers and storage during your editing process.
How to Export Cropped Videos Like a Pro?

Exporting a cropped video like a pro isn’t as tricky as it might seem! First things first, when you’re ready to export, make sure your export settings match the new dimensions of your cropped video. This step helps keep everything looking sharp and clean. For example, if you cropped a section out to focus on a single subject, you might want to set the resolution to 1920×1080 for that high-definition look.
While adjusting your video settings, pay attention to the frame rate too. If your original footage was shot at 30 frames per second, sticking to that for your export will keep your video flowing smoothly. I love using software like Wondershare Filmora because it gives you tons of options to play around with those settings.
Before you hit “export,” take a moment to preview the video. This way, you can catch any last-minute tweaks you might want to make. And when it comes to compression, be careful! If you compress too much, you might notice your video looking blurry or losing some quality. Always aim for the highest quality options available when exporting, so your final video keeps that eye-catching clarity which is so important.
Now, let’s talk about how to choose the right file format after you’ve nailed those settings! Just like selecting the best material in a curved rail system, choosing the correct settings ensures durability and performance in your exported video.
Frequently Asked Questions
Can I Crop a Video Without Losing Quality?
Ah, the elusive dream of cropping video without sacrificing quality—like finding a unicorn in a tech jungle. With expert cropping techniques, one might retain video fidelity, but often, resolution heartbreak is inevitable. Quality comes at a cost.
Can You Crop Without Losing Quality?
Yes, one can crop without losing quality by utilizing appropriate software that emphasizes cropping benefits and quality retention. Proper export settings and high-resolution footage are essential for minimizing visual degradation during the editing process.
Is It Possible to Resize a Video Without Losing Quality?
Absolutely, resizing a video without losing quality is not a mythical feat. Proper video compression techniques and meticulous resolution scaling can preserve clarity, especially when high-quality editing software is utilized to retain original specifications throughout the process.
How Do I Edit a Video Without Losing Quality?
To edit a video without losing quality, one should utilize video editing software that supports quality preservation. Starting with high-resolution imports, customizing export settings, and previewing edits are vital steps in achieving ideal results.


