As an Amazon Associate, we earn from qualifying purchases. Some links on this site are affiliate links at no extra cost to you. Our recommendations are based on thorough research and editorial judgment.
Turning Raw Adventure Clips Into a Clear Step-by-Step Tutorial
To turn raw adventure clips into a clear tutorial, start by organizing footage into themed folders, such as landscapes and local culture. Choose appropriate editing software based on your skill level, like Adobe Premiere Pro for professionals or iMovie for beginners. Enhance audio and visual quality through noise reduction and color correction. Craft a compelling story by structuring the video with a beginning, middle, and end. Optimize export settings for the best playback quality. Discover detailed techniques next.
Key Takeaways
- Organize raw footage into themed folders for easy navigation, enhancing clarity and workflow during the editing process.
- Define a clear structure with a beginning, middle, and end to effectively convey the tutorial steps.
- Use varied shot types and smooth transitions to maintain engagement and highlight key moments in the tutorial.
- Incorporate location-specific sounds and conduct noise reduction for professional audio quality.
- Export using high-quality settings and ensure compatibility with the intended platform to maximize reach and clarity.
Mastering Travel Video Editing: Essential Steps for Beginners
You may be interested


Hey there! If you’re just starting out in travel video editing, the first thing you should focus on is staying organized and mastering some basic techniques. Trust me, having your raw footage sorted into folders based on locations or events makes it super easy to find specific clips later. For example, if you went hiking in Costa Rica and explored some waterfalls, create a folder just for that. It’ll save you so much time down the road!
Next up, get comfortable with essential editing techniques like cutting and trimming. They really help in making your video flow nicely. Think of it like telling a story—cut out the parts that don’t add value. If you shot a long scene of you setting up your camera, trim it down to just the action to keep viewers engaged.
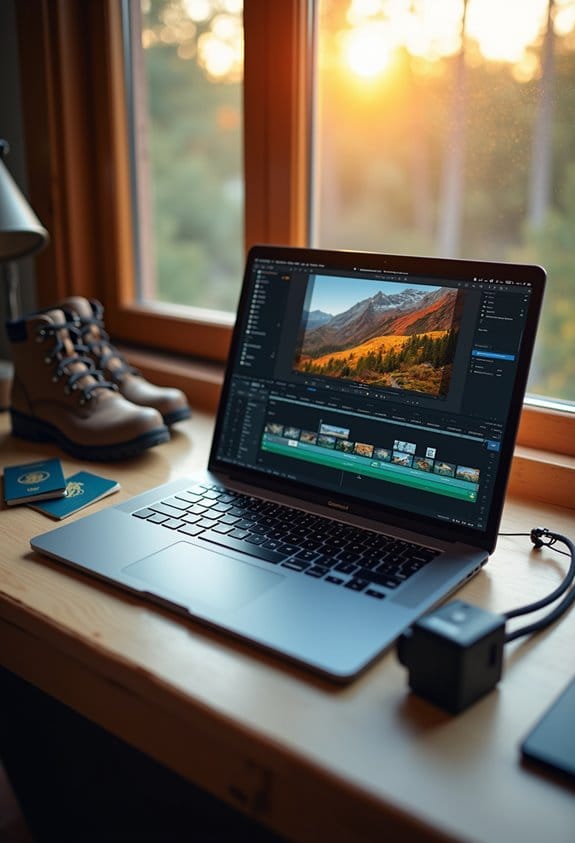
When it comes to software, I recommend starting with something user-friendly like iMovie or DaVinci Resolve. Both have interfaces that are pretty intuitive, so you won’t get overwhelmed. And don’t overlook the importance of audio! Use noise reduction tools to get rid of distracting background sounds. For example, if your video has wind noise, these tools can help make the dialogue crisp and clear.
Lastly, mix up your shots! Use aerial views to capture the stunning landscapes, close-ups for those personal moments, and wide angles to give context. Having a variety of shots keeps things visually interesting for your viewers. It’s also important to ensure your footage is stable by using durable camera mounts designed to minimize vibrations. Now that you’ve got a handle on the basics, let’s talk about how to piece everything together for a seamless final product!
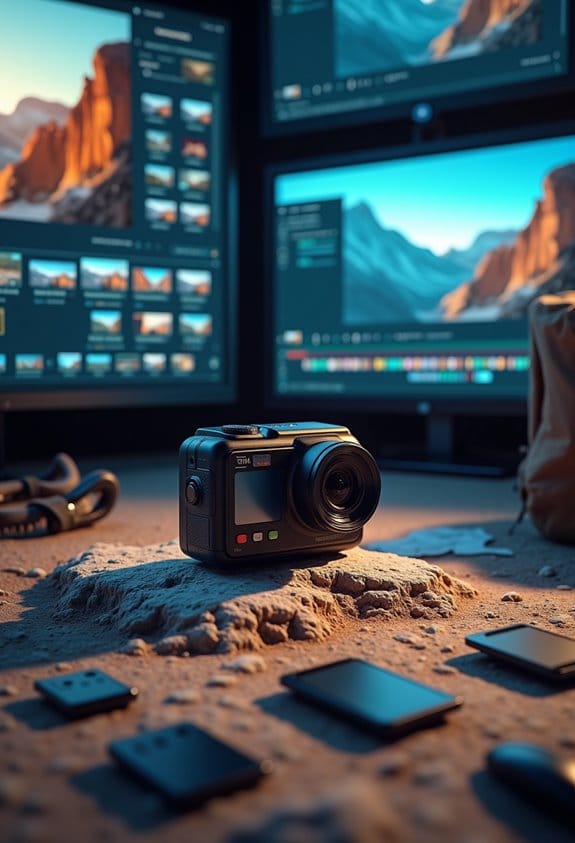
Organizing Your Raw Footage by Themes

Hey there! So, if you’re working on a video project, organizing your raw footage by themes is super important—it makes the editing process way smoother and helps tell your story clearly. Start by sorting your clips into categories like landscapes, local culture, food, and activities. For instance, if you shot footage at a farmer’s market, you could create a specific folder just for food clips.
Using software like Adobe Premiere Pro, you can set up bins for each theme which makes it easy to find what you need later on. And don’t forget about tagging or labeling your clips, too. You could label a clip of a street performer as “local culture” or “music,” depending on what fits your narrative best. This way, when you’re knee-deep in editing, you can quickly grab what you need without sifting through hundreds of clips.
It’s also a good idea to check that you have a balanced amount of footage from each theme. This helps keep your audience engaged without focusing too heavily on one aspect of the story. After categorizing everything, take a moment to review those themes—you want to make sure they fit the overall narrative you’re trying to create. If something feels out of place, don’t hesitate to adjust it before you start piecing the video together! Keeping everything organized in this way truly sets you up for a clearer editing process. Additionally, incorporating footage captured using adjustable head and chest straps can add immersive perspectives that enhance the storytelling.
Best Software Tools for Travel Video Editing

When you’re looking to edit travel videos, picking the right software can make a huge difference in how your final project turns out. If you want more control over your edits and aim for that polished, professional look, Adobe Premiere Pro is a solid choice. On the flip side, if you’re just starting out and prefer a simpler approach, iMovie is perfect since it’s free and super user-friendly.
For those who use a Mac, Final Cut Pro is a great option because it speeds up rendering times and helps organize your workflow easily. If you’re after a powerful tool without spending a dime upfront, check out DaVinci Resolve; it offers some impressive features in its free version, making it suitable for high-quality video projects. And if you’re looking for something that strikes a balance between ease of use and functionality, Filmora fits the bill with its intuitive interface that lets you create content quickly.
No matter where you stand in your video editing journey, there’s definitely a tool out there that will meet your needs. So, now that you have a better idea of what’s available, let’s talk about some tips for gathering that breathtaking travel footage in the first place! For capturing this footage, using an action camera with Electronic Image Stabilization can significantly improve the smoothness and quality of your videos.
Enhance Your Video’s Visual and Sound Quality
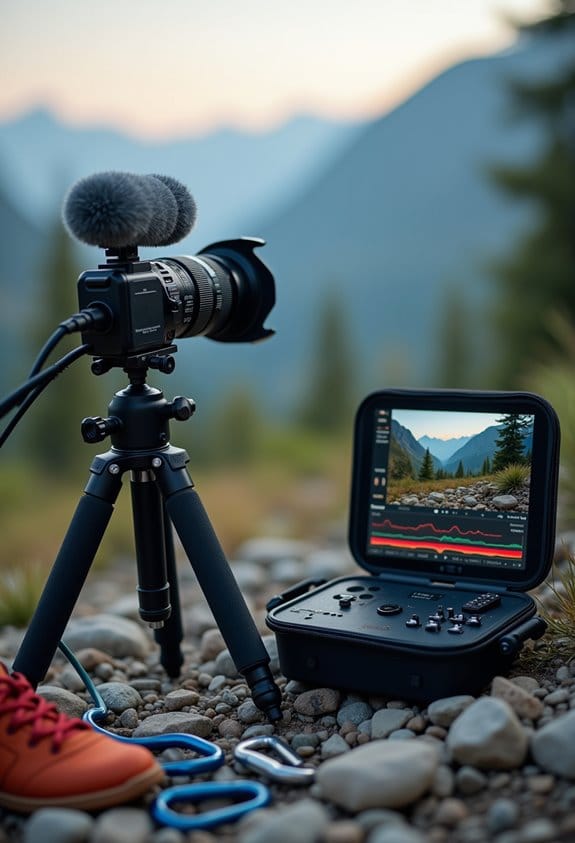
If you’re looking to enhance your video’s visual and sound quality, there are some really effective editing techniques you should consider. First, noise reduction tools are your best friend when it comes to cleaning up audio. They can help remove annoying background sounds, making the dialogue much clearer. For example, if there’s a fan humming in the background while someone is talking, noise reduction can help minimize that distraction, so the speaker’s voice shines through.
Next, let’s talk visuals. Color correction is key to achieving a consistent look. Think of it like making sure all the colors in your film match; it ties everything together and helps convey the story better. You can also play around with transitions between shots—using smooth fades or creative cuts can keep the flow interesting.
And don’t forget about sound design! Adding location-specific sounds, like birds chirping if you’re filming in a park, can really bring your video to life. Imagine someone watching your tutorial and feeling like they’re right there with you. These steps not only polish your raw footage but also help engage viewers in a more immersive way. So, with these techniques, you’re well on your way to creating something that grabs attention! Additionally, ensuring your footage is backed up with high-quality action camera batteries can help prevent interruptions and maintain consistent shooting sessions.
Craft Your Story: Editing Strategies for Engagement
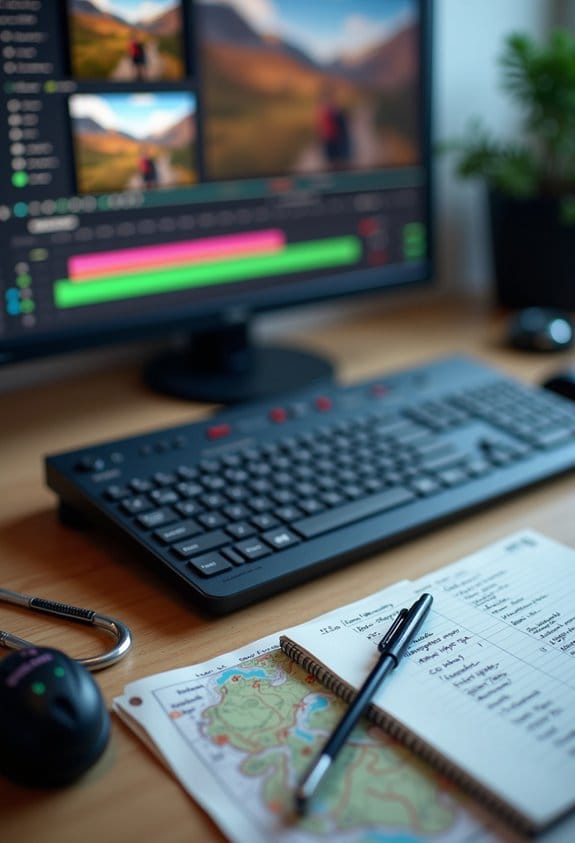
Hey there! So, when it comes to making travel videos, shifting your focus from just improving video quality to telling a captivating story is essential for keeping your viewers hooked. You really want to start with a clear structure—think of it like a good book with a beginning, middle, and end. For instance, if you’re highlighting a trip to a beautiful beach, begin with the excitement of arriving, move into the fun you had during your stay, and wrap up with a reflective moment on your way back.
Mixing up your shots can really help tell your story too! Use wide shots to showcase stunning landscapes and close-ups that capture unique details, like the grains of sand or your friend’s smile as they splash in the waves. Make sure to transition between these shots in a way that flows naturally; rather than just jumping around, guide your audience through the experience.
And here’s a tip: play with pacing! Alternate between longer, scenic shots of the sunset and quicker cuts of fun moments, like dancing or trying local food. This keeps the emotional vibe alive and helps maintain viewer interest. When you go through your footage, really look for those key moments that stick out—like when you first see the ocean or share a joke with a local. Refining the edit around these moments will help you create an engaging and authentic story. The result? An experience that resonates with your audience and draws them in.
Also, remember that using adjustable tricolor LED lights in your footage can enhance the visual appeal, especially in scenes with varying light conditions.
How to Export Your Video for Best Results
When it comes to exporting a video, getting it right is crucial for keeping the quality intact and making sure it’s in the right format for wherever you plan to share it. Think of it this way: if you’re exporting a video, you want to use high-quality settings, like ProRes or RAW. This ensures that the video stays sharp and detailed when others watch it.
Set the export resolution to match the original footage, usually either 4K or 1080p, because this helps avoid any loss of detail. For instance, if your original video was shot in 1080p, you should stick to that resolution when you export. Also, picking the right frame rate is important—24fps gives you that classic cinematic feel, while 30fps works great for everyday viewing. This helps your video flow smoothly.
Now, let’s talk compression. Choosing the right settings is key to finding a good balance between file size and quality. Too much compression can make your video look pixelated and ruin the experience. Lastly, do a quick test export. Play it back to check for audio sync and visual clarity. Catching any issues early means you’ll end up with a polished final product.
Also, ensuring compatibility with multi-camera control systems can improve your video workflow when working with footage from multiple camera sources.
And that leads us into the next step: optimizing your video for specific platforms, because each has its own quirks and requirements!
Utilizing Stock Footage for a Professional Touch
Hey there! If you’re working on a tutorial, have you ever thought about using stock footage? It can really boost the overall quality and storytelling of your video. Imagine having access to stunning visuals that fill any awkward gaps—you can find just the right clips on sites like Shutterstock or Adobe Stock.
For example, if you’re explaining a cooking technique, you could use stock footage of delicious, beautifully plated dishes to hold your audience’s attention while you share your tips. The good news is, this lets you focus more on the creative parts, like your narration and editing, rather than stressing over making every shot yourself. Plus, if you use customizable templates, it can help keep everything looking polished and professional throughout your project.
Just remember to properly credit any stock footage you use. It’s not just about following the rules; it builds trust with your viewers, making them feel more connected to your content. They expect a certain level of professionalism, and using stock footage can help you deliver that effortlessly. Now, let’s chat about how to pick the right stock footage that fits your theme. Additionally, considering the importance of material durability in your equipment can help ensure your gear remains protected during shoots in diverse environments.
Frequently Asked Questions
How to Edit Raw Videos?
To edit raw videos effectively, one should organize footage, utilize essential video editing software tips, experiment with styles for engagement, enhance audio clarity, and export in high-quality settings to guarantee ideal playback across platforms.
Which Platform Is Most Used for Video Tutorials?
YouTube remains the most widely used platform for video tutorials, catering to varied video preferences. Its extensive reach and diverse content make it the preferred choice among creators and learners seeking effective tutorial platforms for guidance.
How to Make a Video Out of Video Clips?
Making a video from clips is like weaving a tapestry; it requires careful planning. First, organize video clip formatting, then execute tutorial video planning by curating key moments and refining them for a mesmerizing final product.
How to Make Youtube Videos Step-By-Step?
To create YouTube videos step-by-step, one must structure content effectively, incorporate engaging thumbnails, and optimize video descriptions. Careful editing, pacing, and audience targeting enhance viewer retention and overall video performance.


