As an Amazon Associate, we earn from qualifying purchases. Some links on this site are affiliate links at no extra cost to you. Our recommendations are based on thorough research and editorial judgment.

How to Film Smooth POV Videos Without Making Viewers Dizzy
To film smooth POV videos without causing dizziness, guarantee steady camera movements by using a gimbal or tripod for stability. Practice slow panning at about 30 degrees per second. Experiment with various angles and shots, while using natural light whenever possible for better quality. Edit your footage carefully to create seamless changes and maintain a consistent color grade. Remember to gather viewer feedback to identify any issues and improve your techniques. More tips can enhance your filming experience.
Key Takeaways
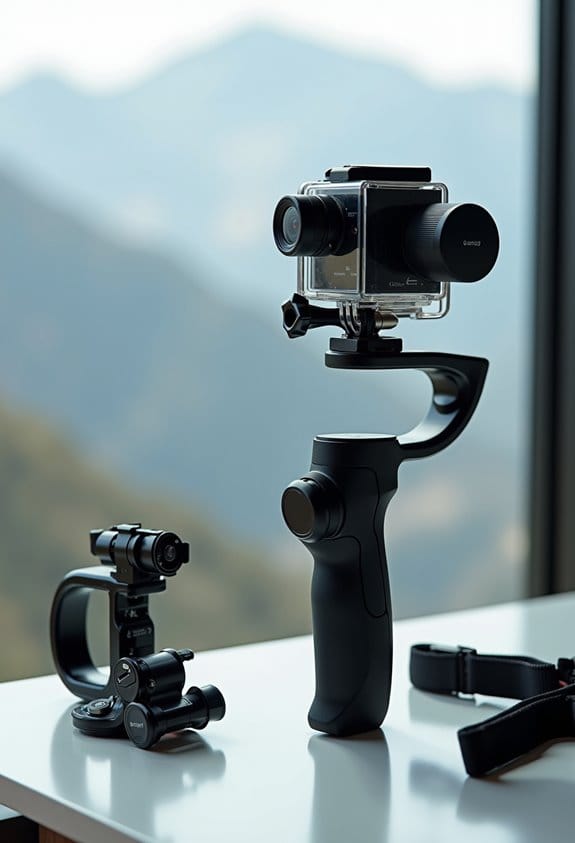
- Use a gimbal or steadicam to minimize camera shake while filming POV videos for smoother footage.
- Maintain steady panning speeds of around 30 degrees per second to avoid sudden movements that can induce dizziness.
- Keep shots short and concise to reduce viewer fatigue, maintaining engagement and comfort throughout the video.
- Experiment with various angles and transitions during editing to create visually engaging yet steady POV footage.
- Utilize natural light and proper camera settings to enhance video quality, ensuring the scene remains clear and easy to follow.
The Importance of Smooth Camera Movements

You may be interested


Hey, have you ever thought about how smooth camera movements can really change the game in filmmaking? When a filmmaker nails those seamless transitions, it can totally enhance the viewer’s experience. Using tools like gimbals or sturdy tripods can help stabilize the shot, making it look a lot more professional. Think about when you watch a movie with jerky camera work—it can really pull you out of the story, right?
To keep things smooth, it’s best to go for slower panning speeds—about two seconds for a full turn. This allows the audience to comfortably follow along without feeling dizzy. You can also tidy up your footage in editing. If you spot any shaky moments, just cut those out. Doing this not only makes everything clearer but also keeps your audience glued to the screen.
For the best results, consider using gimbals with advanced 3-axis stabilization technology to reduce motion blur and ensure smooth footage in dynamic scenes.
How to Choose the Right Filming Equipment

Choosing the right filming equipment is super important for capturing high-quality videos, trust me. It all starts with picking a great camera that has built-in stabilization features. This little gem helps reduce shake, so your video looks smooth and professional. For example, if you’re filming a nature walk, having stabilization means you won’t end up with a shaky view of the trees swaying in the wind.
Next, you’ll want a wide-angle lens, especially if you’re shooting things like travel vlogs or group scenes. This lens lets you capture more of the scene—and it gives viewers that immersive feel, almost like they’re right there with you. And don’t forget about a gimbal or steadicam. This handy tool keeps the camera steady, so when you’re moving around shooting various shots, everything stays smooth. Using a tripod for static shots is also key; it locks your camera in place, which is crucial for those longer, more detailed scenes.
And while you’re at it, pay attention to how comfortable the gear feels. Heavy or awkwardly shaped equipment can really wear you out during a shoot. If you feel good while filming, you’re more likely to capture better footage. Choosing the right equipment not only helps with the quality but can also make filming a lot more enjoyable. So, with that in mind, let’s talk about how you can pick the perfect setting for your shoot!
In addition, consider using chest harness and head straps for hands-free stability and immersive first-person perspective footage during active shoots.
Smooth Panning Techniques for Better Filming

Hey there! If you’ve ever watched a film and marveled at how smooth the camera moves when panning across a scene, you’ve probably appreciated some solid filming skills. Capturing those smooth panning shots is totally key to elevating your video content. The trick is to keep your panning speed steady—aim for around 30 degrees per second. This tempo not only makes the visuals more comfortable for your audience but also helps to avoid that dizzying effect that fast movements can create.
A good way to start honing this skill is by using a tripod or a gimbal. These tools can really cut down on camera shake, giving you that fluid motion that looks so professional. Try starting your pans slowly; you could even practice by following a moving object, like a friend walking across the room. Once you feel more comfortable, gradually increase your panning speed, and watch your audience’s reactions to see what feels best. Using a 3-axis gimbal system is especially effective in counteracting unwanted movements for smooth footage.
Stabilization Tools for Steady Shots
Hey there! If you want your filming to look super smooth, using stabilization tools is a must! Think of gimbals and steadicams as your best buddies for keeping camera shake in check when you’re moving around. For example, if you’re shooting a scene while walking, a gimbal will help you glide along as if you’re floating — the footage looks amazing!
Now, if you’re setting up for a shot that doesn’t require movement, a good tripod is your go-to. It locks your camera in place and makes everything nice and clear—like when you’re capturing a scenic landscape. Oh, and don’t forget about your camera or smartphone. Many of them actually have optical image stabilization (OIS) built in, which is fantastic for handheld shooting.
When you get to the editing stage, there’s also digital stabilization software that can tidy up any little jitters in your footage. It’s pretty neat! Plus, if you’re feeling adventurous and want some aerial shots, drones with built-in stabilization will give you those breathtaking views without the shaky look. Additionally, using a vibration dampening mount can significantly reduce shake when attaching cameras to motorcycles or other moving vehicles.
Setting Up Your Shots for Clearer Videos

Hey there! So, let’s chat about setting up shots for clearer videos. It’s really important if you want your audience to stay engaged and actually enjoy what you’re putting out there. A great way to start is by creating a shot list before you even pick up the camera. Think of it as your roadmap – it keeps each scene focused and gives viewers something interesting to latch onto.
If you’re filming something from a point-of-view angle, definitely consider using a tripod or a gimbal. These tools help keep your shots nice and steady, which is key for avoiding that shaky cam vibe that can be a bit hard to watch. For instance, if you’re filming a hiking adventure, a gimbal can help capture those smooth, sweeping views without the bumps.
Also, don’t shy away from playing with your framing! Using the rule of thirds, where you divide your frame into three parts both horizontally and vertically, can make your shots visually appealing. Just remember not to cram too much into the frame; way too much action can be overwhelming. Changing your camera angle or height can also make a huge difference in how immersive your video feels. If you’re shooting a tutorial, for example, getting a bit higher or lower can really connect viewers to what you’re demonstrating.
And here’s a friendly tip: keep your shots short and sweet. This helps prevent viewer fatigue and keeps them interested in your content. By being purposeful and concise, you’ll likely see a better response from your audience.
To make capturing those shots even easier, consider using an action camera controller to remotely start and stop recording without interrupting your setup.
Alright, ready to set that scene? Let’s move on to the next step in shooting engaging videos!
Tips to Avoid Camera Shake While Filming
Hey there! So, if you want to avoid camera shake while filming, one of the best things you can do is use a tripod or a gimbal. These tools are fantastic for providing that extra stability, which plays a huge role in making your shots look smooth and professional. Imagine filming a scene of a city street; with a tripod set up, you can easily capture the lively atmosphere without any shakiness ruining the vibe.
Now, if you find yourself filming handheld, here’s a quick tip: keep a steady grip on your camera and try to use your body to absorb any bumps or movements. This means bending your knees a bit, and keeping your elbows close to your body. Plus, if you can, lean against a stable surface like a wall or a railing. It really helps reduce unwanted motion and makes your shots look way more polished.
Also, don’t forget to take advantage of any stabilization features that might be built into your camera or in the editing software you’re using. For instance, many cameras have options to minimize shake, so it’s worth playing around with those. And when you’re filming, try making slow, deliberate movements rather than quick jerks—it makes a world of difference! You’ll find it becomes much easier to keep everything smooth.
For activities requiring hands-free filming, consider using an action camera head mount strap to maintain stability and reduce unwanted shake during movement.
Engage Your Viewers With Different Angles
Using different angles to engage your viewers is a game changer when it comes to making POV videos. Think about it: when you mix things up with high, low, and even tilted shots, it adds a whole new layer of excitement to your storytelling. For example, imagine filming a skateboarder from above as they soar through the air, then switching to a low angle to capture the thrill of their landing—it’s a thrill ride for the viewer!
Over-the-shoulder shots can also provide a great sense of context. They make your audience feel like they’re right there in the action, sharing the experience with the character. You can use wide shots to set the scene and close-ups to capture the details—this creates a balanced visual narrative that keeps people interested.
Don’t forget about diagonal angles; they can really spice things up and make your visuals pop! Just remember to transition smoothly between these angles during the editing process, so your viewers stay engaged and oriented with what’s happening. Each angle should work towards helping the viewer connect with the story, making it all the more compelling. So, think creatively with your filming styles and consider how each perspective can enhance your video’s narrative! Using accessories like the GoPro Display Mod can also help you monitor your shots in real time, ensuring your angles and framing are just right.
Lighting Techniques for Smooth POV Videos
Hey there! If you’re looking to make smooth POV videos that really catch the eye, lighting is everything. Trust me, using natural light can make a world of difference. It’s soft and even, which not only makes your video look good but is also easy on the eyes, reducing strain for your viewers.
Now, let’s talk about a cool technique called three-point lighting. This involves using a key light to illuminate your main subject, a fill light to soften any harsh shadows, and a backlight to create some nice depth. Imagine you’re shooting outdoors during golden hour; that’s prime time for natural light! Just be sure to adjust your camera’s exposure settings so you don’t end up with super bright spots or areas that are too dark.
You might also want to grab a diffuser or reflector. These can help soften those bright daylight beams and make everything look more polished. This way, your audience can enjoy the video without feeling dizzy or overwhelmed by light. When you pay attention to these lighting techniques, you’re setting the stage for videos that are both engaging and comfortable to watch. Plus, it just makes the whole production process that much more enjoyable!
Choosing cameras with advanced stabilization technology can further help ensure your footage stays smooth and easy to watch.
Now that we’ve covered lighting, let’s move on to camera movement techniques that can elevate your POV videos even further.
Editing Tips for Seamless Transitions
Hey! If you’re creating POV videos, you know how important smooth shifts are for keeping your audience engaged, right? Well, the good news is that there are some really effective editing techniques that can help with that! One of the easiest things you can do is use L-cuts and J-cuts when you’re editing. This means letting the audio from one scene carry over into the next scene, which creates a more natural flow and keeps the viewer connected.
Another tip is to try using crossfades or dip-to-black transitions. These tools soften the video changes, so it doesn’t feel jarring for viewers when there’s a shift. Think of it like easing into a pool instead of jumping in—the transition feels a lot nicer! And don’t forget about color grading; keeping your colors consistent makes everything feel harmonious, and this way viewers won’t get distracted by sudden visual changes.
Lastly, some motion blur can really smooth out quick movements in your video, making everything look more polished. It’s all about making your audience feel like they’re part of the action, not just watching it. Before you start filming, sketch out a storyboard or a simple shot list. This will help you think through the narrative purpose of each cut, making your edits feel intentional and smooth. You’ll find that when you plan ahead, everything flows together beautifully! What’s next on your video project list?
To further enhance smoothness in your POV shots, consider incorporating precise rotation timing tools for capturing dynamic, stable footage.
How to Gather Viewer Feedback to Improve Your Filming Skills
Hey there! If you’re looking to enhance your filming skills and create more engaging POV videos, gathering viewer feedback is absolutely key. Think about it: when you ask your audience what they liked or what felt a bit off, you gain valuable insights that can really sharpen your craft. For instance, if viewers mention that certain camera movements make them dizzy, you know that’s an area to work on!
One simple way to collect this feedback is by using social media and video-sharing platforms to create polls or surveys. You could ask questions like, “What part of the video made you feel most immersed?” or “Was there anything in the footage that felt shaky?” Getting direct responses can spark some great discussions in the comments, and encourage others to share their experiences too.
Another avenue you might explore is connecting with fellow videographers. Setting up a feedback exchange can open your eyes to new techniques or perspectives you hadn’t considered. Plus, analyzing viewer retention metrics from your analytics helps too! If you notice people dropping off at a certain point, it could signal that there’s a pacing issue that needs tweaking.
Ultimately, being open to feedback not only helps you refine your filming style but also builds a deeper connection with your audience. It’s a win-win! Don’t forget that using impact-resistant camera bags to safely transport your gear can also improve your filming experience by protecting your equipment from damage. Want to delve into the next steps for boosting your editing skills?
Frequently Asked Questions
How Do You Film a Good POV Video?
To film a good POV video, employ point of view techniques with deliberate camera stabilization methods, adjusting movement speed. Incorporate scene composition tips, ensuring fluid shifts to maintain viewer engagement and enhance overall experience.
What Are the Common Mistakes in POV Filming?
Common mistakes in POV filming include neglecting camera stability techniques, as evidenced when a filmmaker’s footage wobbles dramatically during quick turns. Additionally, avoiding sudden movements and ensuring ideal frame rates are essential for viewer comfort.
How Can I Make My Pov Videos More Engaging?
To enhance engagement in POV videos, one should utilize creative angles and dynamic movement while incorporating immersive storytelling. These elements collectively create an engaging viewing experience that captivates audiences and keeps their attention throughout the narrative.
How to Film Pov With No Hands?
In the world of filming, one must think outside the box. Utilizing camera stabilization techniques, creative gear options like gimbals, and effective shooting angles allows filmmakers to achieve intriguing, hands-free POV shots that engage viewers seamlessly.


