As an Amazon Associate, we earn from qualifying purchases. Some links on this site are affiliate links at no extra cost to you. Our recommendations are based on thorough research and editorial judgment.

Slow Motion Done Right: FPS and Shutter Settings for Clean Results
To achieve clean slow motion, shoot at a higher frame rate like 120 fps or more for smoother playback. Follow the 180-degree shutter rule, setting your shutter speed to twice the frame rate; for example, at 120 fps, use 1/240 sec. Confirm lighting is bright to prevent grainy footage, and consider using ND filters to control light levels. Proper settings maintain clarity, essential for impactful results. Further techniques can enhance your slow motion footage effectively.
Key Takeaways
- Shoot at 120 fps or higher for pronounced slow motion effects, ensuring fluid playback when slowed down to 10% at 30 fps.
- Follow the 180-degree shutter rule by setting the shutter speed to double the frame rate, e.g., 1/240 sec for 120 fps.
- Utilize proper lighting, aiming for bright conditions to prevent underexposure and grainy footage, maintaining an ISO around 100.
- Employ ND filters to reduce light entering the lens, allowing slower shutter speeds while preserving motion blur for smoother visuals.
- In post-production, use frame blending or optical flow for seamless playback and adjust speed to enhance dramatic effects.
How to Choose Frame Rates for Optimal Slow Motion

You may be interested


Hey! Let’s chat about choosing the right frame rates for awesome slow-motion shots. When you’re looking to create that perfect slow-motion effect, the frame rate you pick plays a huge role in how everything looks when you play it back. For instance, if you film at 120fps and then play it back at 30fps, you’ll notice things move a lot slower, giving you that dreamy, elegant feel.
Now, here’s a tip to keep your footage smooth: always set your shutter speed to double your frame rate. So, if you’re shooting at 120fps, that means your shutter speed should be 1/240 seconds. It’s a simple rule that keeps your shots clear and crisp. If you decide to shoot at 60fps, set your shutter to 1/120 seconds, which still gives you that nice slow-motion effect without looking choppy.
If you want even more flexibility, consider shooting at higher frame rates like 240fps. This allows you to slow down the action to just 10% of the original speed while maintaining quality. Just keep in mind that good lighting is key since high frame rates tend to reduce motion blur. To keep your gear safe while shooting, consider using a waterproof hard case to protect your camera and accessories. So, next time you’re ready to capture some cool slow motion, remember these tips for smooth and stunning footage! And speaking of lighting, let’s dive into how to create the perfect lighting setup for your slow-motion scenes.
Recommended Products

The Construction Pack Tikee 4 comes in a dedicated hard case. It contains 1 Tikee 4 Timelapse camera, 1 Stainless Steel Arm, 1 Stainless Steel reinforcement plate, 1 Mounting Kit, 1 256GB MicroSD Card, 1 Cable Lock, 1 pair of lens caps

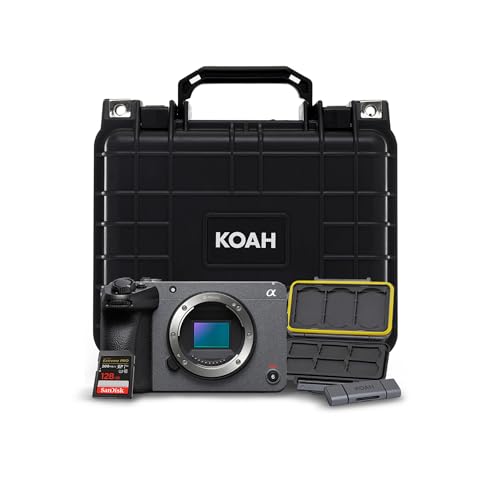
Bundle Includes: Sony Cinema Line FX30 Super 35 Camera (Body Only) Weatherproof Hard Case with Customizable Foam (10 x 9 x 7 Inch) 128GB SDXC Memory Card 2-in-1 Aluminum SD Card Reader and Rugged Memory Storage Carrying Case
Influencing Motion Playback Quality With Shutter Speed

When you’re working on slow-motion footage, the shutter speed you choose can really make a difference in how smooth it looks. For the best results, aim to set your shutter speed at twice your frame rate. For example, if you’re shooting at 60 frames per second (fps), you’ll want to use a shutter speed of 1/120 sec. If you crank it up to 120fps, reverse that to 1/240 sec.
Now, if you’re feeling creative and want to add some motion blur for a more dynamic feel, you could use a slower shutter speed like 1/4 or 1/8 sec. Just keep an eye on it—too much blur can make things look messy. Also, if your camera has a global shutter, that’s a fantastic feature to have. It helps eliminate motion artifacts, ensuring your fast movements stay clear and crisp.
Don’t forget about lighting! With high frame rates, you’ll need plenty of light to prevent grain and noise in your shots. Balancing your frame rate and shutter speed is key to getting high-quality slow-motion footage that looks professional. So now that you know about shutter speed, let’s talk about how to set up your lighting for those stunning slow-motion shots.
Additionally, using high-quality batteries in your camera ensures longer recording sessions without interruptions, letting you focus fully on capturing perfect slow-motion moments.
Essential Camera Settings for Best Slow Motion Results

To get amazing slow-motion footage, you really need to nail down some camera settings before you start filming. First things first, aim for a much higher frame rate than what you’ll be using for playback. For example, if you’re planning to display your footage at 24fps, you should shoot at 120fps. This way, when you slow it down, it looks smooth and dreamy instead of choppy.
Next, there’s the shutter speed – this one’s pretty vital too. For that 120fps shot, you should set your shutter speed to 1/240 sec. This helps keep your action nice and clear while reducing that pesky motion blur. Think about it like this: if you’re capturing a fast-moving subject, a slower shutter speed can make things look messy, almost like a painting in motion.
Now, don’t forget about lighting! Each frame needs enough light to shine, especially when you’re shooting at those higher frame rates. So, if you’re filming outdoors, aim for bright sunny days or bring in some extra lights when you shoot indoors. Also, just a quick tip: make sure your project timeline matches your frame rate to keep everything in sync. If your camera has a global shutter option, go for it! It can really help reduce unwanted motion artifacts and make your slow-motion videos pop even more.
One additional setting to consider for optimal video quality is utilizing your camera’s Electronic Image Stabilization feature to keep your footage smooth during dynamic movements.
As you can see, nailing the technical details sets the stage for some seriously stunning slow-motion work! Now, let’s talk about some creative ideas to use this slow-motion footage effectively in your projects.
Recommended Products

World’s lightest1 600mm super-telephoto full frame wide-aperture F4 lens

Sony’s extensive high-performance G Master line work with the 50.1 megapixel*1 Exmor RS image sensor and BIONZ XR image processing engine to create deep, lifelike, high-resolution rendering. The sensor’s high pixel count means that resolution is still a very impressive 21 megapixels (approx.) when shooting in APS-C mode or cropping to APS-C size after shooting.

NEW LEICA Q2 DF Camera Bundle Includes:
Strategies for Managing Lighting in Slow Motion Shots

Hey there! Let me tell you about managing lighting for slow-motion shots—it’s super important! If you don’t get your lighting right, your footage could end up looking underexposed, which is a big no-no, especially if you’re filming at high frame rates like 120fps or 240fps. When you crank up that frame rate, you need to be extra diligent about lighting conditions, so make sure you have some solid equipment on hand.
For instance, using high-powered continuous lights or flash units can really help you keep the exposure just right. Don’t forget about the shutter rule, which is all about matching your shutter speed to your frame rate for crisp images. Try keeping your ISO around 100; this keeps noise down and clarity up. If you find you’re still losing light, you can open up your aperture or slap on some neutral density (ND) filters to let you shoot in brighter conditions without blowing out your shots. Also, consider protecting your camera gear in a waterproof camera bag to ensure your equipment stays safe and dry during your outdoor shoots.
Recommended Products

We have USA stock and can ship you by local truck next day after you ordered,all cost covered.You never have to wait for long time and never have customs clearance issue.

BRING ANY SPACE INTO THE VIRTUAL WORLD - Matterport Pro3 3D Camera enables you to capture and view spaces in stunning, photo-realistic detail. Whether scanning an indoor space or capturing a high-resolution model of an outdoor landmark, Pro3 delivers unparalleled precision and performance.

Mounting Type: Nikon F
Techniques for Smooth Slow Motion in Post-Production

If you want to achieve smooth slow motion in your videos during post-production, it all starts with how you capture your footage. Ideally, you should record at least twice the frame rate you plan for playback. For instance, if you’re aiming for a smooth 24 frames per second (fps) playback, try recording at 60fps. This technique helps maintain the fluidity of movement in your shots.
When you’re in editing software like After Effects, take advantage of features like frame blending or optical flow. These tools are designed to enhance the transitions between frames, making your slow-mo look silky smooth. Also, make sure your high frame rate footage is interpreted correctly; for example, if you shot at 120fps, set it to play back at 30fps. This way, you’ll achieve a rich 4x slow motion effect.
Lighting plays a crucial role too. Good lighting helps maintain image quality and keeps noise to a minimum, which is vital for a crisp-looking slow motion. You might also want to experiment with time stretch settings in your editing software to play around with the speed of your footage and add your artistic touch. With these tips in your toolkit, you’ll see a noticeable improvement in your slow-motion shots, making your projects even more captivating!
Common Mistakes to Avoid in Slow Motion Video Recording
Capturing slow motion video can be a lot of fun, but it’s easy to make a few simple mistakes that might mess up your footage. For starters, let’s talk about shutter speed. If you’re filming at 120 frames per second (fps), you’ll want to set your shutter speed to about 1/240 of a second. Skipping this step can lead to motion blur or even a stuttery playback, which is definitely not what you want.
Another thing to consider is your frame rate selection. If you go with something like 59.94 fps, it helps ensure your video flows smoothly. A common mistake is not paying attention to your lighting conditions—if you’re filming in low light and crank up the ISO, you might end up with grainy footage. Instead, try to set up enough lights in your scene; for example, using softbox lights can really brighten things up without losing clarity.
Finally, if you’re aiming to shoot at super high frame rates like 768 fps, remember that you’re going to need plenty of light since higher frame rates can make your shots darker. So, light it up! With these tips, you’ll be well on your way to capturing stunning slow motion footage. Next, let’s explore some creative subjects or scenes that work beautifully in slow motion.
For added stability and hands-free shooting during dynamic scenes, using a chest mount harness can significantly improve your video quality.
How to Use ND Filters for Effective Slow Motion
Hey there! So, if you’re getting into filming slow motion video, let me tell you how crucial ND filters are for keeping your shots looking great. Basically, Neutral Density (ND) filters cut down the amount of light that hits your camera lens. This gives you the freedom to slow your shutter speed without washing out your image. Think of it this way: if you’re shooting at 60 frames per second, you’ll want your shutter speed set to around 1/120 of a second for that buttery smooth look. That’s following the simple 180-degree shutter rule.
Now, if you’re filming outside on a sunny day, you’ll definitely want to reach for stronger ND filters, like ND 6 or ND 10. This is a must if you want to avoid overexposure and keep that dreamy motion blur. The last thing you want is to find out after filming that your footage looks overly bright and washed out! Once you’ve captured your clips, play them back and check if they give you the effect you were going for.
And don’t hesitate to try out different ND filters! They can really enhance the depth of field and motion blur in your footage, which makes everything pop a little more. Just remember: experimenting is part of the fun! Now, when you’re all set with your slow-motion shots, let’s talk about some editing tips to polish everything up.
For the best results, look for ND filters made with high-quality optical glass to maintain clarity and reduce unwanted reflections in your footage.
Recommended Products

Bundle Includes: 1 x Blackmagic Design Pocket Cinema Camera 6K Pro (EF Mount), 1 x 64GB UHS-II Memory Card, 1 x Corel Photo Software With PhotoMirage, AfterShot, Painter Essentials, PaintShop Pro, and Video Studio, 1 x NPF550 Battery, 1 x Large Padded Case, 1 x Led Light, 1 x Deluxe Cleaning Set, 1 x HDMI Cable, 1 x 12_inch Flexible Tripod, 1 x External Charger, 1 x Hand Strap, 1 x Memory Card Wallet

INCREDIBLE IMAGE QUALITY: Features Super 35 image sensor with native resolution of 6144 x 3456 and an active EF/EF-S lens mount; 13 stops of dynamic range to capture even the slightest details; Dual gain ISO up to 25,600 to minimize grain and noise in all lighting conditions; Built-in 2, 4, and 6 stop ND filters

INCREDIBLE IMAGE QUALITY: Features Super 35 image sensor with native resolution of 6144 x 3456 and an active EF/EF-S lens mount; 13 stops of dynamic range to capture even the slightest details; Dual gain ISO up to 25,600 to minimize grain and noise in all lighting conditions; Built-in 2, 4, and 6 stop ND filters.
Exploring Frame Rate Interpolation for Enhanced Results
Hey! So, if you really want to amp up your slow-motion footage, frame rate interpolation is a great technique to try. Basically, it’s all about creating extra frames between the ones you already have, giving your video a much smoother look. For instance, if you’re working with some clips shot at a lower frame rate, you can easily boost that to a higher playback rate for a more fluid viewing experience.
Programs like Adobe After Effects or Premiere Pro can really help you out here. They have tools like frame blending and optical flow that estimate what those in-between frames should look like. It’s super handy! A solid tip is to shoot at a much higher frame rate than what you plan to play it back at; for example, record at 120 frames per second (fps) if you want to show it at 24 fps. Just remember to keep an eye on your shutter speed to avoid any weird motion blurs. Using reliable equipment such as an extendable camera pole can help stabilize your shots for better slow-motion results.
Recommended Products

Dual Mode: 4K UHD 240Hz or Full HD 480Hz - LG UltraGear OLED is a VESA Certified Dual Mode gaming monitor. This innovation allows gamers to experience graphically rich, story-driven games in 4K/UHD at up to 240Hz or switch to Full HD at up to 480Hz for fast-paced FPS, MOBA or racing games via hotkey.
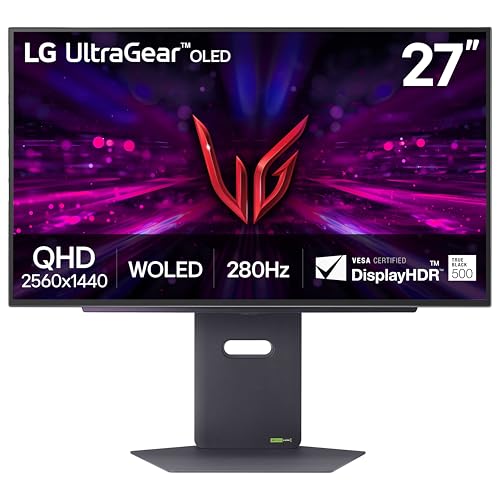
LG's Brightest OLED Gaming Monitor - Experience the brightness and speed of 4th Gen OLED on a vivid 27" QHD display—engineered for ultra-smooth, tear-free gameplay. With up to a 280Hz refresh rate and lightning-fast 0.03ms response time, you’ll react faster, track every movement with precision, and outpace your opponents frame by frame with astounding brightness, clarity and speed.

[4K 60Hz,Provide Smoother Experience]HDMI upgraded for 4K at 60HZ, capable of transmitting double the video data of 4K at 30HZ. Provide smoother visuals and maintains high-frame-rate dynamic images from cameras.
Editing Tips for Maximum Impact in Slow Motion Videos
Editing slow-motion videos can really bring a whole new dimension to your shots, but there are some key details to keep in mind for maximum impact. First off, make sure your footage is shot at least 2 to 4 times faster than the frame rate of your final video. For instance, if you’re aiming for a smooth 30 frames per second (fps) in your final product, you’ll want to shoot your footage at 120fps. This gives you the flexibility to slow things down without losing quality.
Once you’ve got your clips in the timeline, you can adjust the speed. If you take that 120fps footage and set it to play back at 20% speed, the action slows down dramatically, allowing viewers to take in all the little details. You might also want to use techniques like frame blending or optical flow in your editing software to keep the motion feeling smooth and connected. It helps to eliminate any choppiness that might pop up when you slow things down.
And don’t forget about matching your project’s sequence settings with your intended final frame rate. This little step can save you from playback headaches later on. Lastly, consider adding some motion blur during post-production to enhance that natural flow, making your video feel more cinematic. This way, the visuals seamlessly transition even as you extend the clip duration. It’s all about making those moments count! Now, let’s talk about how to choose the right music to complement your stunning visuals.
Using a Bluetooth remote shutter can make capturing slow-motion shots much easier by enabling precise timing without camera shake.
What Are the Best Practices for Slow Motion Video?
If you’re aiming to create stunning slow-motion video, there are a few best practices you definitely want to keep in mind! First off, shooting at a higher frame rate is crucial—aim for at least 120 frames per second (fps). This way, when you play it back at the standard 24 or 30 fps, the slow-motion effect is really pronounced. For instance, if you record a dramatic action scene, the extra frames capture more detail, making it feel like the moment is really stretching out.
Next, let’s talk about shutter speed. A good rule of thumb is to set your shutter speed to double your frame rate. So, for example, if you’re shooting at 120 fps, go for a shutter speed of about 1/240 seconds. This is super important because it helps control motion blur, ensuring that the actions look sharp and clear instead of all smeared together.
Lighting is another key factor. Higher frame rates might not let as much light in, which could lead to darker footage. Try using bright lights or shooting outdoors during the golden hour to keep your ISO low and your image free from noise. And don’t forget to set your camera to a timebase of 23.98 fps for smoother playback!
Got all that? Great! Now, if you want to take it to the next level, consider over-cranking your footage. This basically means shooting at an even higher frame rate than necessary, capturing even more frames, which can give you incredible details in motion. It’s all about experimenting to find what looks best for your project!
For underwater slow-motion filming, using a stabilizing dive handle can greatly reduce shaky footage and improve overall video clarity.
Frequently Asked Questions
What Is a Good Fps for Slow-Motion?
A good fps for slow-motion techniques typically includes 120fps for smooth motion, 240fps for cinematic effects, and even higher rates for extreme sequences. Proper camera settings, especially shutter speed, are essential for best results.
What Should My Shutter Speed Be for Slow-Motion?
For ideal slow-motion, the shutter speed should ideally be double the frame rate to minimize motion blur. Under varying lighting conditions, adjusting the shutter speed may require wider apertures or additional lighting to maintain exposure.
Is 120 or 240 Better for Slow Mo?
In the domain of visual storytelling, 240 fps embodies clarity, revealing nuances obscured by 120 fps, which graces smoother motion. However, 240 invites potential motion blur effects, challenging resolution impact and necessitating careful decision-making for best results.
Is 30 or 60 Fps Better for Slow-Motion?
In the frame rate comparison, 60fps outperforms 30fps for slow motion due to reduced motion blur and ideal camera settings. This choice enhances workflow optimization, creating smoother footage with increased cinematic impact during playback.


